How to Record TeamViewer Sessions - 3 Workable Ways
TeamViewer is one of the most popularremote work softwarethat can help you control and monitor different devices remotely, such as phones, computers, etc. The software has an intuitive interface, small size, yet rich in functionality. The company's press releases claim that the number of installations of TeamViewer exceeds one and a half billion. The computer (mobile device) can be either "managing" and "managed" - either you remotely control someone else's device, or you put the system in the hands of a remote user yourself. Once the connection is established, the remote screen will be visible to you and the other endpoint. You will be able to send and receive files and have access to a shared clipboard.
除此之外,它是出现在在线视频有限公司nferences, making it easy and possible to start online meetings, video calls, and more. Suppose you are attending an online video conference in TeamViewer and want to record the session for later checking, then how to get the task done?
Luckily, TeamViewer offers simple screen recording. Here, on this page, we will show you how to record TeamViewer sessions with this application. Moreover, some alternative recording software is also available here. Just keep reading.
Record TeamViewer Session with Built-in Recording Features
As discussed above, TeamViewer has a built-in screen recorder that enables you to capture all the sessions and online meetings. But it is a little troublesome to activate and use the inbuilt recording features if you are new to it. Given that, we offer a step-by-step guide to recording TeamViewer sessions with the built-in recording tool.
#1. Record TeamViewer Sessions Manually
Step 1.Launch TeamViewer and connect to another device to start a TeamViewer meeting.
Step 2.Next, click "File" > "Extras" > "Start session recording" in the top toolbar. Then, you will find that the TeamViewer screen recording task begins.

Step 3.When you have captured the sessions, you can click on the "Stop" button to end the recording.
#2. Record TeamViewer Meetings Automatically
Step 1.Open TeamViewer on your computer, then click on the gear icon in the upper right corner of TeamViewer.
Step 2.Click on the "Remote control" button, and check the box next to Start recording of remote control sessions automatically.

Step 3.Then, click "Extras" > "Options" > "Meeting Default". Finally, check the box "Auto record meeting".
Step 4.When all settings are done, you can start connecting a TeamViewer meeting, which will be recorded automatically.
Although TeamViewer provides a built-in recording feature, it also has some disadvantages:
- Cannot record audio files, actions, and more
- Export recordings in TVS format
- Only view the record files within TeamViewer
To avoid these issues, you'd better find some professionalvideo capture softwarelike those below.
How to Record TeamViewer Sessions with Audio
If you want to record TeamViewer sessions with the audio or want to edit the recording in real-time, you can try the following excellent screen recording software. Let's take a look together.
#EaseUS RecExperts
Thisfree screen recorderis for both Windows and Mac users, making all recording tasks easy, including recording TeamViewer meetings. As for capturing TeamViewer sessions, it enables you torecord screen with audioand even a webcam at the same time. Also, you can choose to record it in different modes, including full screen, partial screen, or even a window. During the TeamViewer screen recording, you can even use the annotation tools to draw lines or add texts to emphasize the key points easily.
Most importantly, thisfree video recording software可以导出记录in various formats, including but not limited to MP4, AVI, MOV, MKV, etc.
Main features:
- Allows you to record screen without time limit
- Supportschedule recordingfeatures
- There will be no watermark on your recordings
- Various output formats are available
- Provide some necessary editing tools
Now, just hit the below button to get it, and start your TeamViewer screen recording task.
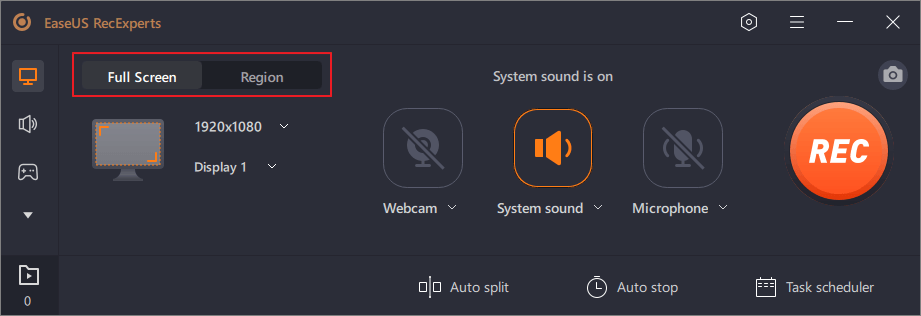
Step 1.Launch EaseUS RecExperts. There are two modes for screen recording. Choose"Full Screen", this tool will capture the whole screen; choose"Region", you will need to select the recording area manually.

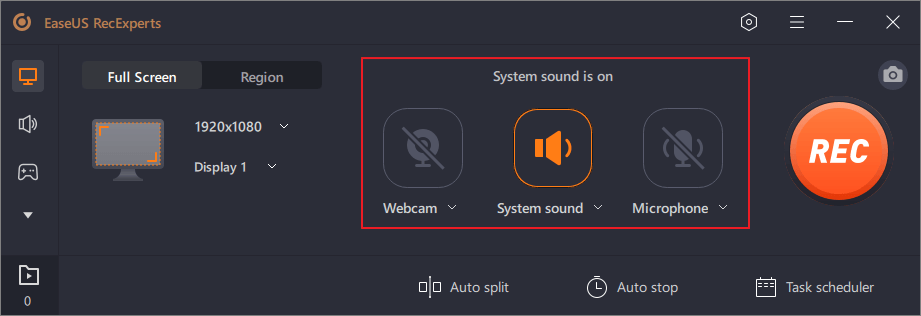
Step 2.After that, you can choose to record thewebcam,system sound, ormicrophoneas you like. Of course, you can turn them off if you only need to record the silent screen.

Step 3.Then, you can click the red"REC"button to start recording. Now you will see a menu bar on your screen. If you want to pause the recording, click on the white"Pause"button; to end the recording, click on the red"Stop"button.
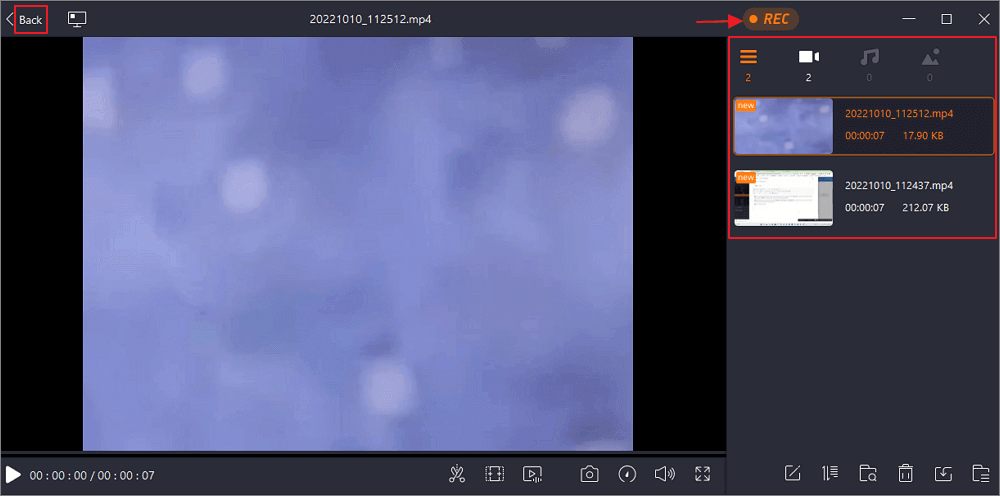
Step 4.After recording, you will be led to the recording list interface. Here you can view or edit your recordings easily.

#OBS Studio
另一种可行的方式来记录TeamViewer会议is to use OBS Studio. It is anopen source screen recorderthat performs perfectly on Windows, Mac, and Linux computers.
With its help, you can record TeamViewer sessions effortlessly. Apart from that, you also can use it torecord streaming video, like Netflix, Hulu, etc., or use it to start live streaming to Discord, YouTube, or other platforms. However, this multifunctional freeware has a complicated user interface. If you use it for the first time, you'd better refer to some guides. If you only use it to record TeamViewer sessions, the below tutorial is enough:
Step 1.Launch OBS Studio, and adjust some settings by clicking Settings before starting recording, like resolution, output format, etc.
Step 2.Next, launch TeamViewer and connect to another device to start a meeting. After that, go back to OBS, and click "+" > "Display Capture" to add the TeamViewer screen.
Step 3.Repeat step 2 to add the studio source for your recording. When you are done, click on "Start Recording" on the bottom left to begin your TeamViewer screen recording activity.

Final Words
Although TeamViewer has already offered the built-in recording feature, it is still not an ideal tool for TeamViewer session recording, because of the limited output format, or other factors. On the contrary, EaseUS RecExperts can overcome all the disadvantages and give you a better user experience for recording. With its aid, you can record almost anything on your screen with no limitation. Just try it, and you will never disappoint.
TeamViewer Screen Recording FAQs
1. Where are TeamViewer recordings saved?
If you captured the TeamViewer sessions using the built-in recording feature, you can find the recordings in the default folder: C:/Users/username/AppData/Local/Temp/TeamViewer/Version. If you have already changed the saving path before, you will find it in the changed path.
2. How can I record my TeamViewer call?
If you use the TeamViewer that runs version 3.5 or later, you can easily record your TeamViewer calls in this application, as a session recording feature is available here. Follow the below steps to start your recording:
Step 1.First, you need to create a TeamViewer session.
Step 2.Next, click Extras > Record > Start in the menu of the remote control window.
Step 3.To end the recording, just click on Extras > Record > Stop to finish it.
BTW, if you want more advanced recording functions, you can opt for a professional screen recorder, like EaseUS RecExperts, OBS Studio, etc.
3. Can TeamViewer record keystrokes?
No, TeamViewer cannot record keystrokes. However, it can send the key combinations.
4. Does TeamViewer allow audio?
Yes. TeamViewer allows audio. With its remote audio and video, you can hear all the sound coming from the remote computer from the system sound or other installed applications.
Was This Page Helpful?
About the Author
Jane is an experienced editor for EaseUS focused on tech blog writing. Familiar with all kinds of video editing and screen recording software on the market, she specializes in composing posts about recording and editing videos. All the topics she chooses


