
-
![]()
Daisy
Daisy is the Senior editor of the writing team for EaseUS. She has been working in EaseUS for over ten years, starting from a technical writer to a team leader of the content group. As a professional author for over 10 years, she writes a lot to help people overcome their tech troubles.…Read full bio -
Myra joined EaseUS in 2017. As a big fan of Apple products, she mainly focuses on iOS data transfer and iOS troubleshooting tips. Meanwhile, she is expanding her knowledge and skills in other fields like data recovery and disk management. Myra is open-minded and likes both extensive and intensive reading. Other than reading and writing, she is also fond of mobile games and K-pop stars.…Read full bio
-
![]()
Sofia Albert
Thank you, dear reader, for taking the time to read my articles and for visiting the EaseUS website. I hope you find my articles are helpful. Have a nice day!…Read full bio -
Jane is an experienced editor for EaseUS focused on tech blog writing. Familiar with all kinds of video editing and screen recording software on the market, she specializes in composing posts about recording and editing videos. All the topics she chooses are aimed at providing more instructive information to users.…Read full bio
-
![]()
Melissa Lee
Melissa is a sophisticated editor for EaseUS in tech blog writing. She is proficient in writing articles related to multimedia tools including screen recording, voice changing, video editing, and PDF file conversion. Also, she's starting to write blogs about data security, including articles about data recovery, disk partitioning, data backup, etc.…Read full bio -
Jean has been working as a professional website editor for quite a long time. Her articles focus on topics of computer backup, data security tips, data recovery, and disk partitioning. Also, she writes many guides and tutorials on PC hardware & software troubleshooting. She keeps two lovely parrots and likes making vlogs of pets. With experience in video recording and video editing, she starts writing blogs on multimedia topics now.…Read full bio
-
![]()
Gorilla
2022年加入EaseUS大猩猩。作为一个智能手机值列表er, she stays on top of Android unlocking skills and iOS troubleshooting tips. In addition, she also devotes herself to data recovery and transfer issues.…Read full bio -
![]()
Jerry
"Hi readers, I hope you can read my articles with happiness and enjoy your multimedia world!"…Read full bio -
Larissa has rich experience in writing technical articles. After joining EaseUS, she frantically learned about data recovery, disk partitioning, data backup, multimedia, and other related knowledge. Now she is able to master the relevant content proficiently and write effective step-by-step guides on related issues.…Read full bio
-
![]()
Rel
Rel has always maintained a strong curiosity about the computer field and is committed to the research of the most efficient and practical computer problem solutions.…Read full bio -
![]()
Gemma
Gemma is member of EaseUS team and has been committed to creating valuable content in fields about file recovery, partition management, and data backup etc. for many years. She loves to help users solve various types of computer related issues.…Read full bio -
Dawn Tang is a seasoned professional with a year-long record of crafting informative Backup & Recovery articles. Currently, she's channeling her expertise into the world of video editing software, embodying adaptability and a passion for mastering new digital domains.…Read full bio
-
![]()
Sasha
Sasha is a girl who enjoys researching various electronic products and is dedicated to helping readers solve a wide range of technology-related issues. On EaseUS, she excels at providing readers with concise solutions in audio and video editing.…Read full bio
Page Table of Contents
Dawn Tang
Updated on Aug 22, 2023
0Views|0min read
In the realm of audio production, ensuring pristine sound quality is paramount, butremoving distortion from audio可以是一个道nting challenge. Fortunately, Adobe Audition offers an array of powerful tools and features to tackle this issue effectively.
Whether you're an audio enthusiast or a seasoned professional, mastering the art of fixing distorted audio in Adobe Audition is an essential skill that can transform your recordings.
In this comprehensive guide, we will explore proven techniques and step-by-step methods to bring clarity back to your audio projects. Let's get started.
| Methods | Effectiveness | Suitable for |
|---|---|---|
| DeClipper Effect | Restore heavily and lightly clipped audio files. | Clipped audio and distorted sections. |
| Spectral Frequency Display | Visualize and edit audio frequencies. | Unwanted background noise in the recording environment. |
| Adaptive Noise Reduction | Specify the noise level and configure reduction parameters. | Wind rumble, tape hiss, or power-line hum. |
| Noise Reduction | Capture noise print and adjust the amount of noise reduction. | Constant noise, such as hiss or hum. |
| Frequency Analysis | Visually edit audio waveforms. | Beeps hisses, and other noises. |
| EQ | Adjust frequencies and enhance the overall tonal balance. | Targeted noise frequencies, like low-frequency rumble, high-frequency hiss, and resonances. |
| Automatic Click Remover | Apply for multiple scans and repair passes automatically. | Crackle and static from vinyl recordings |
What Causes Audio Distortion
Audio distortion is the alteration of sound quality, causing artifacts and unwanted frequencies, degrading the listening experience.
Audio distortion can stem from several factors, resulting in undesirable background noises or distortion. Common culprits include clipping, where audio signals exceed recording or playback limits, leading to cut-off peaks and harsh sounds.
Overloading audio equipment beyond its capacity can also introduce distortion. Additionally, background noise like electrical hum or hiss, frequency interference, and acoustic problems like room reflections, echoes, or improper microphone placement may degrade audio quality.
Digital compression, faulty equipment, and signal distortion during conversion can further contribute to the issue. Understanding these causes enables the effective implementation of techniques to clean up audio in Adobe Audition.
How to Clear out Distorted Audio in Adobe Audition
Thenhow to remove background noise in Adobe Audition? We already know the causes of distorted audio, next, it's time to take targeted measures.
1. Using DeClipper Effect️
The DeClipper effect fixes clipped waveforms by replacing clipped sections with new audio data caused by exceeding the maximum level for the current bit depth. Clipped audio visually appears as flat areas at the top of a waveform, resulting in static-like distortion.
There is also a DeClicker effect that identifies and eliminates clicks and pops originating from various sources, such as wireless microphones, vinyl records, and more. But we'll mainly focus on the former now.
Fix clipped audio in Adobe Audition with DeClipper Effect
Step 1. Import the distorted audio file.
Launch Adobe Audition, go to "File" > "Open" or "Import" to load your audio track. Double-click the track to get the audio waveform.

Step 2. Diagnose your distorted audio.
Select "Windows" > "Amplitude Statistics" > "Scan". You can see the "Possibly Clipped Samples" section after it scans.

Step 3. Use the DeClipper effect.
Select "Windows" > "Diagnostics" > "DeClipper", and choose the preset from heavy, light, or normal degree. Hit "Settings" to configure other features.
- Gain Setting:Specify attenuation level before processing; use "Auto" based on average input amplitude.
- Tolerance:Set amplitude variation for detecting clipped regions; 0% detects perfectly horizontal lines at max amplitude, and 1% is recommended for most clipping.
- Min. Clip Size:Choose the length of the shortest run to repair; lower values fix more samples; higher values require proximity to other clipped samples.
- Interpolation:Cubic option uses spline curves for faster processing, FFT option employs Fast Fourier transforms for severe clipping; choose FFT Size for accuracy and processing time.

Step 4.Scan and repair.
Click "Scan" to check out and hit "Repair All" to fix the distorted wave.

Step 5. Export the audio.
Go to "File" > "Save as" or "Export" to get the final result.

You can also watch the video guide by Mike Russell.
- 0:00Intro
- 0:33Fix
- 2:22Outro
2. Using Spectral Frequency Display
The Spectral Frequency Display in Adobe Audition is a visual representation of audio frequencies over time. It allows for targeted edits to remove unwanted elements like noise, hum, and clicks from the audio spectrum, resulting in cleaner audio recordings.
Clean up bad audio in Adobe Audition with Spectral Frequency Display
Step 1.Open Audition, import the audio file and double-click the track.
Step 2.On the top left corner of the panel, find the icon to show the spectral frequency display.

Step 3.在你的键盘上按下Shift + D现在。
Step 4.Check where your frequencies are if there are sibilants, highlight and see the Hz value.
Step 5.Go to "Window" > "Frequency Analysis", and zoom in on the frequency of that value.
Step 6.Take out the targeted audio.
Share these essential tips on fixing distorted audio in Adobe Audition now!
3. Using Adaptive Noise Reduction️
The Adaptive Noise Reduction effect swiftly eliminates variable broadband noise like background sounds, rumble, and wind. It operates in real time and can be combined with other effects in the Effects Rack and applied in the Multitrack Editor. For optimal results, use it on selections starting with noise followed by desired audio; the effect identifies noise from the initial few seconds of audio.
Eliminate audio distortion in Adobe Audition with Adaptive Noise Reduction
Step 1.Start Audition and drag and drop your audio track. Double-click it on the file panel.
Step 2.Navigate to "Effects" > "Noise Reduction/Restoration" > "Adaptive Noise Reduction".
Step 3.Configure the settings.
- Reduce Noise By:Adjusts noise reduction level (6-30 dB recommended) for bubbly background effects.
- Noisiness:Indicates the percentage of original audio containing noise.
- Fine Tune Noise Floor:Manually adjust the noise floor above/below the auto-calculated floor.
- Signal Threshold:Manually adjusts the threshold of targeted audio above/below the auto-calculated threshold.
- Spectral Decay Rate:Fine-tunes noise reduction for fewer artifacts (short values cause bubbly sounds, long values create reverb effect).
- Broadband Preservation:保持理想的音频在specified frequency bands around found artifacts (lower settings remove more noise).
- FFT Size:Choose high for frequency resolution (artifacts of long duration) or low for time resolution (transient artifacts).

Step 4.Play the audio and click "Apply".
Care for more related articles for other tools?
4. Using Noise Reduction️
The noise reduction effect significantly reduces background and broadband noise while preserving signal quality. It effectively removes various types of noise, such as tape hiss, microphone background noise, and hum, which persist consistently throughout the waveform.
Get Rid of distortion from audio in Adobe Audition with Noise Reduction
Step 1.Start Audition and open the audio track, then turn it into the waveform.
Step 2.Follow the path: "Effects" > "Noise Reduction/Restoration" > "Capture Noise Print".
Step 3.Select the target audio section or the entire track (shortcut key: Command + A).
Step 4.Back to the "Effects" > "Noise Reduction/Restoration" > "Noise Reduction" to set up the options.
- Scale:Choose Logarithmic for low frequencies or Linear for high-frequency work.
- Channel:Displays selected channel with consistent noise reduction.
- Select Entire File:Applies noise print to the entire file.
- Noise Reduction:Controls reduction percentage with minimized artifacts.
- Reduce By:Determines amplitude reduction of detected noise.
- Output Noise Only:Preview noise without affecting desirable audio.

Step 5.Click the triangle icon for advanced settings.
- Spectral Decay Rate for greater noise reduction with fewer artifacts.
- Smoothing to adjust the variance of the noise signal.
- Precision Factor for amplitude changes, Transition Width for audio fade.
- FFT Size for frequency band analysis, and Noise Print Snapshots for capturing accurate data.
Step 6.Click "Apply" and export the audio track.
5. Using Frequency Analysis
Use Frequency Analysis to locate problematic frequency bands and then you can modify them with a filter effect.
Wipe off bad audio in Adobe Audition with Frequency Analysis
Step 1.Import the bad audio into your Audition and display it in the waveform.
Step 2.Go to "Window" > "Frequency Analysis", and the window pops up.
- Scale:Choose a logarithmic or linear frequency display.
- Copy All Graph Data:Copies frequency data to the clipboard.
- Hold buttons:Take up to eight frequency snapshots during playback.
- Display:Choose between Lines, Area, or Bars style for the graph.
- Top Channel:Select a channel to display over others (Average for combining channels).
- Scan or Scan Selection:Displays average frequency data from the entire file or selection.

Step 3.Select and delete the faulty part directly.
Step 4.Or go to "Window" > "Noise Reduction/Restoration" > "Noise Reduction" to use the effect or choose "Filter and EQ" to select a filter for advanced settings.
Step 5.Export the audio.
6. Using EQ
Graphic equalizers enable adjustments across the frequency range, but they affect a range of frequencies around the target. On the other hand, parametric equalizers let you precisely boost or cut specific audio frequencies.
Clear out distorted audio in Adobe Audition with EQ
Step 1.Double-click the audio track to activate the waveform.
Step 2.Select the audio and go to "Effects" > "Filter and EQ" > "Graphic Equalizer".
- Important
- Audition offers three equalizer settings: 10 bands (one octave), 20 bands (one-half octave), and 30 bands (one-third octave). The 30-band option allows precise adjustments across the spectrum but affects narrow frequency bands with each adjustment.
Step 3.Adjust the parameters.
- Gain:Adjust with sliders and Master Gain for overall level.
- Range:Control the slider's range with the Range field.
- Accuracy:Choose the Accuracy level for frequency response.
- Presets:Use presets like 1965, Cymbal Shimmer, Vocal Magic, Generic Mud Removal, or Destination-Home Theater, and customize.

Step 4.Or use "Parametric Equalizer" under the "Filter and EQ" tab.
7. Using Automatic Click Remover
Use Automatic Click Remover for quick removal of crackle and static in vinyl recordings. Correct a large area or single click with real-time operation, and combine it with other effects in the Effects Rack. The effect automatically applies to multiple scan and repair passes.
Clean up bad audio in Adobe Audition with Automatic Click Remover
Step 1.Import the audio file and activate the waveform.
Step 2.Go to "Window" > "Noise Reduction/Restoration" > "Automatic Click Remover".

Threshold:Adjust sensitivity to noise. Lower settings detect more clicks and pops but may retain desired audio. Range: 1 to 100; default is 30.
Complexity:Controls noise complexity. Higher settings may affect audio quality. Range: 1 to 100; default is 16.
Step 3.Apply the settings.
Clean up Bad Audio for Windows in EaseUS VideoKit
EaseUS VideoKit is a powerfulvideo editorfor Windows that comes equipped with advanced tools to help you remove distortion from both audio and video files. With its user-friendly interface, you can easily clean up noisy audio, eliminate background hum, and fix distorted sounds.
是否你处理音频剪辑视频,EaseUS VideoKit offers a seamless solution to enhance the overall quality of your multimedia content. You can also use it toseparate vocals from background noise, compress videos of 1000+ formats, generate video subtitles using AI, and extract audio tracks intelligently.
Here's a guide to wiping off distorted audio from video.
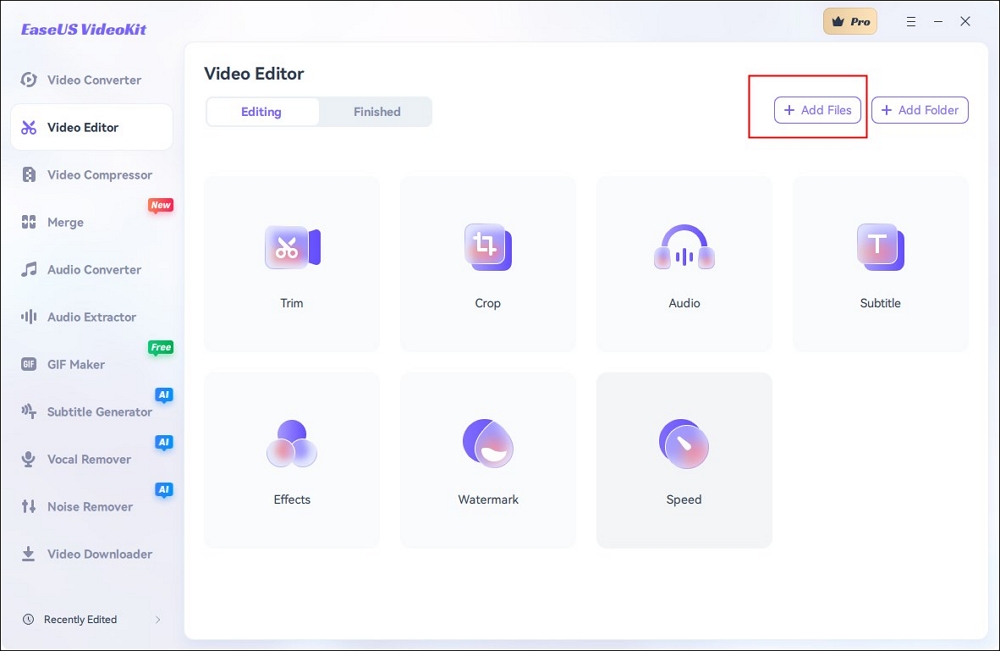
Step 1.Download and launch the softwareEaseUS VideoKit, and click on theVideo Editorfeature.

Step 2.Then you need to chooseAdd Filesto open the video you want to change.
Step 3.After that, you can click on theAudioicon.
Step 4.In theAudiosection, drag theVolumebar to zero, and click on theSaveoption.

Step 5.And then, you can freely export the video file while choosing different resolutions, qualities, formats, encoders, and frame rates as you like.

Final Thoughts
In conclusion, by using Adobe Audition's powerful tools like DeClipper, DeClicker, and Adaptive Noise Reduction, you can effectively fix distorted audio and eliminate unwanted noise.
For a comprehensive audio and video editing solution for Windows, EaseUS VideoKit offers advanced features to remove distortion from both audio and video files, providing a seamless editing experience for professional-level results.
How to Fix Bad Audio in Adobe Audition FAQs
1. How do you fix heavily distorted audio?
To fix heavily distorted audio, you can follow these steps:
- Identify the cause of distortion, such as clipping or background noise.
- Use a compressor to reduce occasional peaking.
- Apply noise reduction to minimize unwanted noise.
- Utilize EQ to balance frequencies and reduce harshness.
- 规范化的音频标准水平。
- Check hardware connections for issues.
- Fine-tune settings in your audio editing software.
2. How do you fix audio quality in Audition?
To improve audio quality in Adobe Audition, you can follow these steps:
- Launch Adobe Audition.
- Go to the "Effects" > "Noise Reduction / Restoration" > "Capture Noise Print".
- Select the audio and click "Effects" > "Noise Reduction / Restoration" > "Noise Reduction".
- Drag the sliders to adjust the amount of noise reduction.
- Click "Preview" to check it out and "Apply" it.
3. How do I fix muffled audio in Adobe Audition?
To fix muffled audio in Adobe Audition, try this:
- Open Audition and go to "Effects" > "Filter and EQ" > "Scientific Filter…".
- Cut out the high-end frequencies and listen to the audio.
- Click "Apply" when it sounds clear.


