Three ways for you to transfer files from iPad to computer via USB and two more ways for you to transfer files from iPad to PC wirelessly.
Data transfer between an iPad and a computer happens quite frequently due to data sharing or device backup. When it comes to transferring files from iPad to PC via USB, there is more than one way that you can apply, and the most suitable way for you varies, depending on the type of content you are going to transfer.
Read on and see how can you transfer files from iPad to PC via USB and carry out the method you like best. (The ways onhow to transfer files from PC to iPad using USBare also detailed.)
Method 1. How to Transfer Files from iPad to PC with an iOS Data Transfer Tool
Supports: Photos, videos, music, ringtones, voice memos, contacts, messages, books, and more
If you are going to copy your iPad files such as photos, videos, music, contacts, and messages, you should try aniPhone transfer softwaretool like EaseUS MobiMover.
EaseUS MobiMover is an iOS data transfer tool as well as a video & audio downloader that uses a USB cable to work. With it installed on your PC or Mac, you will be able to:
- Transfer files between an iPhone/iPad/iPad and a computer
- Transfer data from one iPhone/iPad/iPod to another
- Access and manage your iDevice content from a computer
- Download online videoand audio files to a computer or an iPhone/iPad using URL
Thus, whether you want to transfer data to or from your iOS device, you can use EaseUS MobiMover to get things done easily.
To transfer files from iPad to PC via USB:
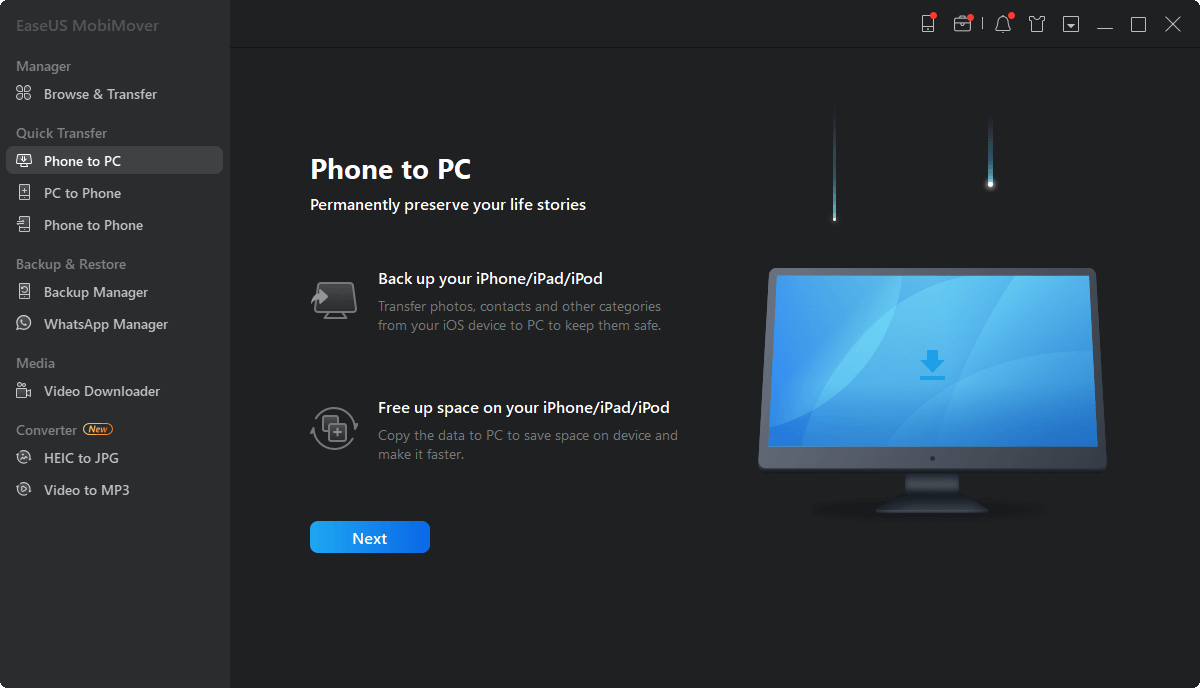
Step 1.Connect iPad to your PC with a USB cable. Once connected, tap "Trust This Computer" on your device's screen. OpenEaseUS MobiMoverand select "Phone to PC" on the main screen. Click "Next" to start transferring data from iPad to your computer.
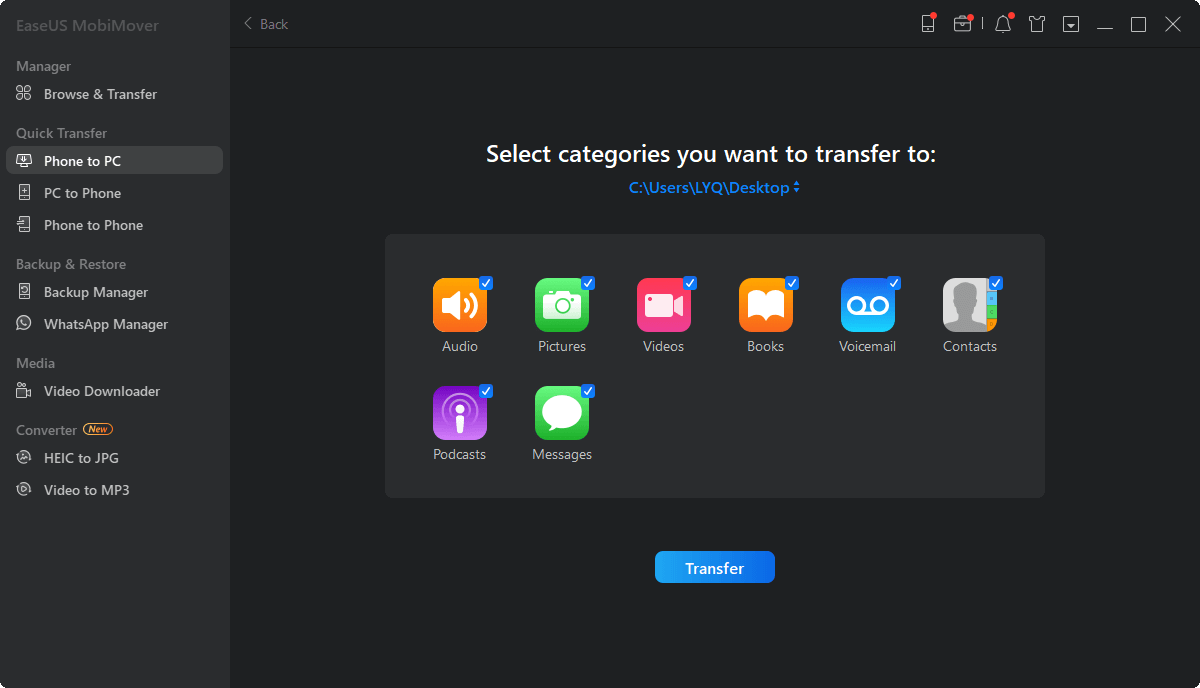
Step 2.MobiMover will read and load all the compatible files on your iPad automatically. Choose Contacts/Messages/Pictures/Audio/Video or other specific types of apps to transfer. The transferred content is kept on Desktop by default, so you need to change the default location before clicking "Transfer".
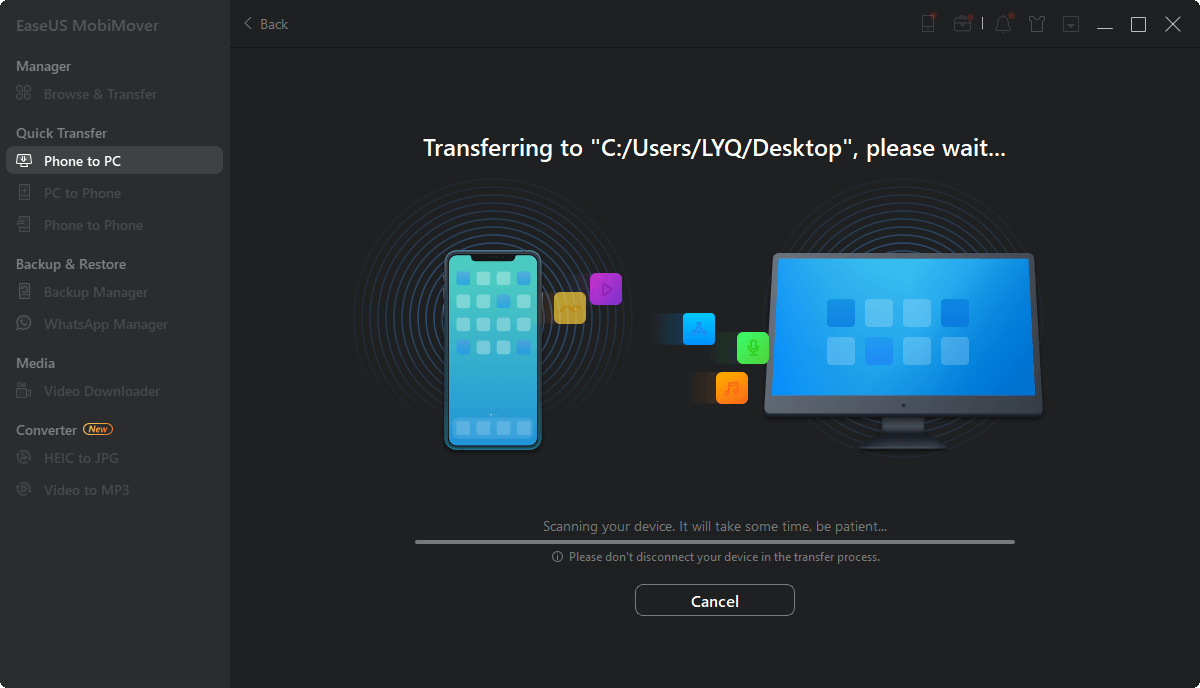
Step 3.MobiMover will immediately begin to transfer data from iPad to PC without iTunes. Don't interrupt the USB connection during the course. When it completes, you can open and check the transferred content. Some files, like contacts and messages, are kept as .html files, so you need to use a web browser to open such a type of file.
Method 2. How to Transfer Photos/Videos from iPad to PC via File Explorer
Supports: Photos and videos
Using File Explorer is quite convenient if you are going to transfer photos and videos from your mobile device to the computer. By connecting your iPad to your PC via the USB port, you can access your iPad's internal storage and then copy the photos and videos from your iDevice to your PC.
Convenient as it is, File Explorer is only helpful when you need to transfer photos and videos from an iPhone, iPad, or iPod to PC. That means if you are looking to transfer other types of content or copy data from a PC to an iDevice, it won't work.
To transfer photos and videos from iPad to PC via USB:
Step 1.Connect your iPad to your PC using a USB cable.
Step 2.Unlock your iPad and trust the computer. (Make sure your iPad is recognized by the computer.)
Step 3.Go to "This PC" > [your iPad's name] >"Internal Storage" > "DCIM" > "100APPLE" and you will see the photos and videos on your iPad.
Step 4.Manually copy the photos and videos from your iPad to the computer.

Method 3. How to Transfer Files from iPad Using iTunes
Supports: Almost all data and settings
iTunes不转移你的iPad文件。在stead, it backs up almost all data and settings on your PC using a USB cable. It is a good choice when you attempt to back up and restore iPhone data. Thus, if you want to transfer your iPad files to PC to make a backup, using iTunes is also a workable solution.
Before you start, make sure you have installed the latest version of iTunes to avoid unexpected issues.
To transfer files from iPad to PC using iTunes:
Step 1.Connect your iPad to your computer.
Step 2.Unlock the device and trust the computer. Then wait for iTunes to launch automatically.
Step 3.Make sure your iPad is recognized and click the "Device" icon.
Step 4.Go to "Summary" and click "Back Up Now" to start transferring data from iPad to PC.

Bonus Tip: How to Transfer Files from iPad to PC Wirelessly
Supports: photos, videos, documents, and more
If there is a network connection, you can also copy files from iPad to computer wirelessly using iCloud. iCloud allows you to share content across your devices over Wi-Fi. Here I'd like to show you how to transfer files from iPad to PC using iCloud Drive. (Before you start, make sure you have enough iCloud storage to save the content you are going to copy.)
Step 1.On your iPad, go to "Settings", select [your name] > "iCloud", and then enable "iCloud Drive".
Step 2.Open the "Files" app and select "Browse" > "iCloud Drive". Search for the files you attempt to copy to your PC and upload them to iCloud Drive.
Step 3.If you have downloaded and set up iCloud for Windows, go to the iCloud Drive folder in File Explorer to access the files from your iPad. If not, go to iCloud.com, sign in with your Apple ID, choose "iCloud Drive" and then select and download the files to your PC.

The Bottom Line
These are the commonest ways to transfer files from an iPad to a Windows PC. Depending on the files you copy, you may need different ways to get your iPad data onto the computer. Specify your needs and follow the easy steps to get it done with ease.
Was This Page Helpful?
Daisy is the Senior editor of the writing team for EaseUS. She has been working in EaseUS for over ten years, starting from a technical writer to a team leader of the content group. As a professional author for over 10 years, she writes a lot to help people overcome their tech troubles.
Myra joined EaseUS in 2017. As a big fan of Apple products, she mainly focuses on iOS data transfer and iOS troubleshooting tips. Meanwhile, she is expanding her knowledge and skills in other fields like data recovery and disk management. Myra is open-minded and likes both extensive and intensive reading. Other than reading and writing, she is also fond of mobile games and K-pop stars.
Related Articles
7 Ways to Transfer MP3 to iPhone from PC or Mac
![author icon]() Myra/Apr 18, 2023
Myra/Apr 18, 2023How to Download Music from Bandcamp
![author icon]() Daisy/Apr 18, 2023
Daisy/Apr 18, 2023Free iPhone Video Transfer: Transfer Videos from PC to iPhone Free
![author icon]() Myra/Apr 18, 2023
Myra/Apr 18, 2023Why Are My iPhone Photos HEIC and How to Convert
![author icon]() Myra/Apr 18, 2023
Myra/Apr 18, 2023

