Applies to: MacBook Air, MacBook Pro, iMac, iPad Air, iPad Pro, iPad mini, and iPad
What Can AirDrop Do for You
AirDrop is a file sharing service available on Apple's macOS, iOS, and iPadOS. With this service on, you will be able to share photos, videos, documents, websites, contacts, and more between two of these devices, including Mac, iPhone, iPad, and iPod.
当你想要你的苹果之间传输文件devices wirelessly, using AirDrop is a quick solution. You canAirDrop photos from iPhone to iPhone, AirDrop contacts from iPhone to iPad, and more.
Since the guide to use AirDrop between two iOS or iPadOS devices has been provided already, here I'd like to show you how to AirDrop between Mac and iPad, which you can also apply to share files between Mac and iPhone.
How to AirDrop Between Mac and iPad
Whether you want to AirDrop from Mac to iPad or from iPad to Mac, there are some preparations you need to make:
- Make sure both devices are within Bluetooth and Wi-Fi range
- Turn off Personal Hotspot on these devices
- Make sure the files you want to transfer are supported by AirDrop
Afterward, turn on AirDrop on your Mac and iPad.
On your iPad:
Step 1.Open the Settings app.
Step 2.Tap "Bluetooth" and turn it on.
Step 3.Go to "General" > "AirDrop" and tap "Contacts Only" or "Everyone."
On your Mac:
Step 1.Open Finder and select "AirDrop."
Step 2.Select the option "Allow me to be discovered by" as "Contacts Only" or "Everyone."
Now you have enabled AirDrop on both the iPad and Mac. Follow the steps below to AirDrop photos, videos, contacts, and more between your devices freely.
How to AirDrop from iPad to Mac
Let me take photo transfer as an example:
Step 1.Go to the Photos app on your iPad.
Step 2.Select the items you want to share.
Step 3.Tap the "Share" button and choose "AirDrop."
Step 4.Tap the name of your Mac and receive these items from your Mac.

How to AirDrop from Mac to iPad
Step 1.Open the AirDrop window.
Step 2.Drag the items you want to send to the recipient.
Step 3.Tap "Accept" on the iPad to receive these files.

How to Transfer Files Between iPad and Mac Without AirDrop
支持s: Photos, videos, contacts, messages, books, voice memos, and more
AirDrop is helpful indeed. But it is not applicable to all kinds of situations. When you want to transfer contacts in bulk or share other types of content that AirDrop doesn't support, it is not advisable to Apply this service. Thus, it's necessary for you to learn how to transfer files between iPad and Mac without AirDrop so that you can handle all kinds of data transfer situations.
To transfer files between two iDevices or between an iDevice and a computer, be it a Mac or PC, theiPhone transfer softwaretool - EaseUS MobiMover could help. Apart from being an iOS data transfer tool, it is also a video downloader that could help todownload YouTube videos to Mac, save Facebook videos to iPhone, and more.
To transfer files from Mac to iPad:
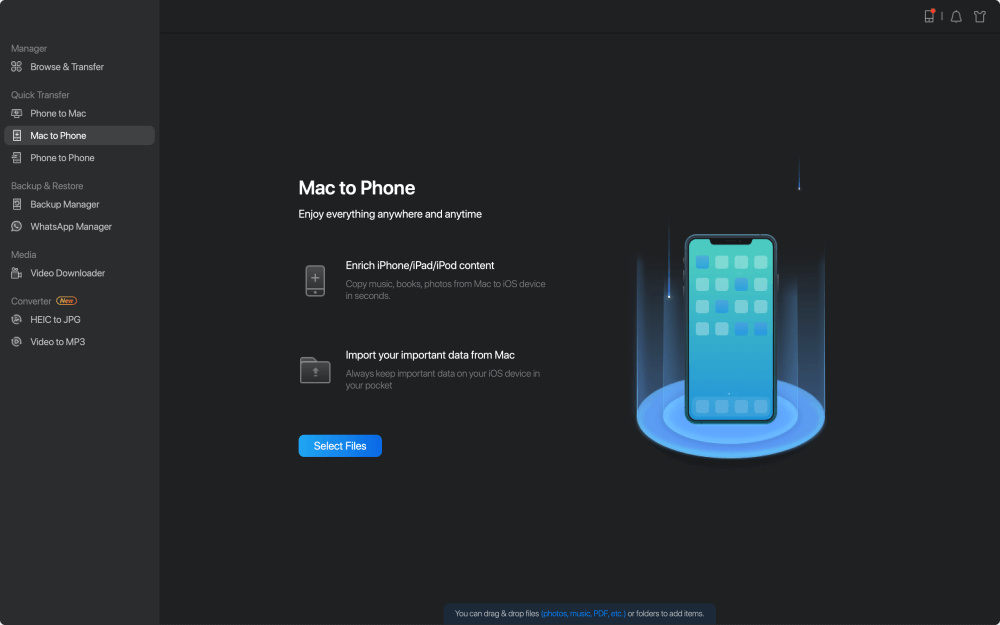
Step 1. Connect your iPad to your Mac, and click "Trust" when a prompt appears on your iPad asking you whether to trust this computer > Run EaseUS MobiMover > Choose "Mac to Phone" from the left pane > Click on the "Select Files" to move on.
Step 2. Go to browse the files you want to transfer. After choosing the desired files, click "Open".
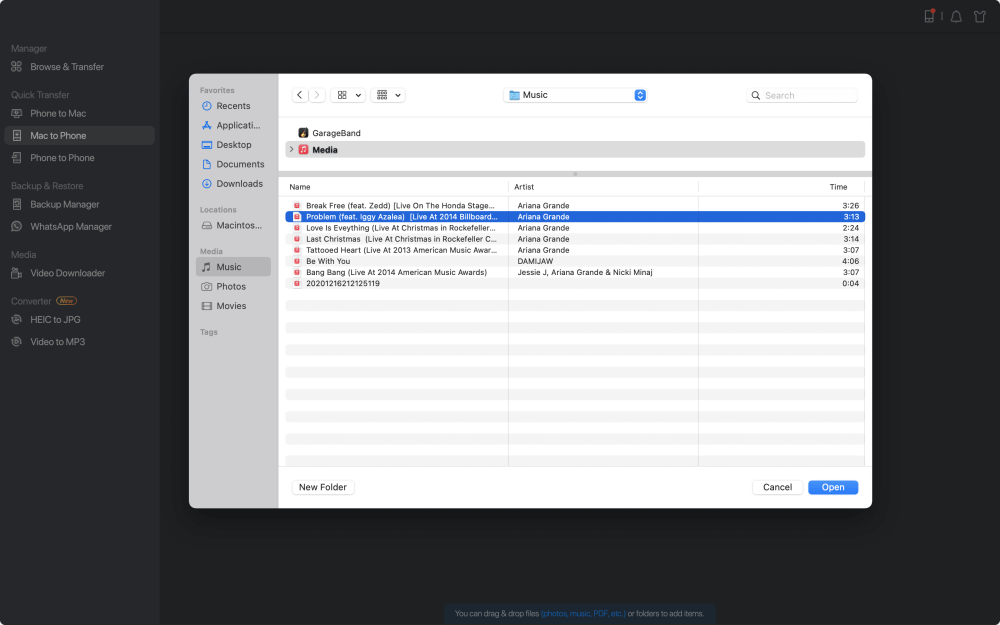
Step 3. Preview the selected files on the right pane, with their detailed file names and file sizes. To add more items to transfer, you can click "Add Contents" or directly drag files or folders from your Mac to the appointed area. Finally, click "Transfer" to start transferring.

The Bottom Line
AirDrop is a convenient solution to share files between two AirDrop-supported devices. In situations where AirDrop can't help, you will need a tool like EaseUS MobiMover to help you transfer data between your iOS or iPadOS devices or between an iDevice and a computer. With these tips, you can transfer files to or from your iPhone, iPad, and iPod easily. By doing so, you can manage your iDevice content freely and effectively. Don't hesitate to give it a try.
Was This Page Helpful?
Daisy is the Senior editor of the writing team for EaseUS. She has been working in EaseUS for over ten years, starting from a technical writer to a team leader of the content group. As a professional author for over 10 years, she writes a lot to help people overcome their tech troubles.
Myra joined EaseUS in 2017. As a big fan of Apple products, she mainly focuses on iOS data transfer and iOS troubleshooting tips. Meanwhile, she is expanding her knowledge and skills in other fields like data recovery and disk management. Myra is open-minded and likes both extensive and intensive reading. Other than reading and writing, she is also fond of mobile games and K-pop stars.
Related Articles
How to Import Videos from iPhone to Mac in 5 Ways
![author icon]() Myra/Apr 18, 2023
Myra/Apr 18, 2023How to Download Audio from YouTube on Mac
![author icon]() Myra/Feb 22, 2023
Myra/Feb 22, 2023How to Sync Notes from iPhone to iPad with/Without iCloud
![author icon]() Myra/Apr 18, 2023
Myra/Apr 18, 2023How to Sync iPhone X/iPhone 8 Calendar with Windows PC in 2 Ways
![author icon]() Myra/Apr 18, 2023
Myra/Apr 18, 2023

