AirDrop is a convenient way to share photos, videos, and other files with people around you. It has won the praise of millions of iOS users since it was released in 2011. Though it has been thrown out for about 10 years, many users still don't know how to use it to deliver photos between an iPhone and a Mac. If this is your case, follow this guide to learn how to transfer photos from iPhone to Mac using AirDrop.
Plus, ifAirDrop does not work on your iPhone or iPad, you can also use the AirDrop alternative offered in this guide to transfer photos.
| Workable Solutions | Step-by-step Troubleshooting |
|---|---|
| Part 1. AirDrop Photos | Make preparations > Turn on AirDrop on the devices > Open the Photos app on iPhone...Full steps |
| Part 2. Risks of Using AirDrop | AirDrop may raise some problems, such as privacy leakage...Full steps |
| Part 3. Transfer Photos Directly | Download and install the iOS data transfer software > Connect the iPhone to the computer...Full steps |
How to AirDrop Photos from iPhone and iPad to Mac
很容易空投照片,视频,和其他费尔es from iPhone and iPad to Mac. Before doing this, you'll need to do some preparations, as the following list shows.
- AirDrop requires iPhone and Mac with a quite new iOS and OS system.
- Bluetooth and WiFi on both devices should be enabled.
- iPhone and Mac should be within about 30 feet of each other.
- Turn on AirDrop on both your iPhone and Mac.
If everything is ready, you can follow these steps to AirDrop
Step 1. On your iPhone or iPad, open the Photos app.
Step 2. Select the photos and videos you wish to send.
Step 3. Tap the "Share" icon, which looks like a box with an arrow coming out of it.
Step 4. Tap the AirDrop icon.
Step 5. Then, you'll see icons for all of the AirDrop-compatible devices. Just choose your Mac.

Step 6. Choose to Accept on the pop-up window showing the photos will be transferred from iPhone to Mac.
Step 7. When the process finishes, the photos will be located in the users Downloads folder on Mac.

Note: If you have trouble with the AirDrop transfer between the Mac and iOS devices, you can restart both devices to fix the problem. Suppose the devices can't recognize and find each other, set AirDrop to Everyone instead of Contacts Only.
Some Potential risks of using AirDrop
Though AirDrop brings great convenience to users to move files, it also raises some problems. The biggest problem is privacy leakage. According to researchers at Germany's Technische Universitat Darmstadt, if a user offers the "Contacts only" option for AirDrop, Apple devices need to silently request personal data from all devices within range.
That means your phone number and email address are possible to be learned by a stranger. Given that, we advise you to reduce the use of AirDrop. If you must move files, you can try some other transfer tools like EaseUS MobiMoverinstead.
How to Transfer Photos from iPhone to Mac with EaseUS MobiMover
If you're searching for an iPhone data transfer to replace AirDrop, try thisiPhone data transfer tool- EaseUS MobiMover. As a comprehensive data transfer program, EaseUS MobiMover enables you to transfer over 20 types of data from iPhone to Mac. No privacy leakage happens. You can complete the whole process in a completely safe environment. Apart from that, it also allows you to manage iPhone data by backing up iPhone data, removing unwanted files from iPhone, transferring data between two iOS devices, etc.
To transfer photos from iPhone to Mac with EaseUS MobiMover:
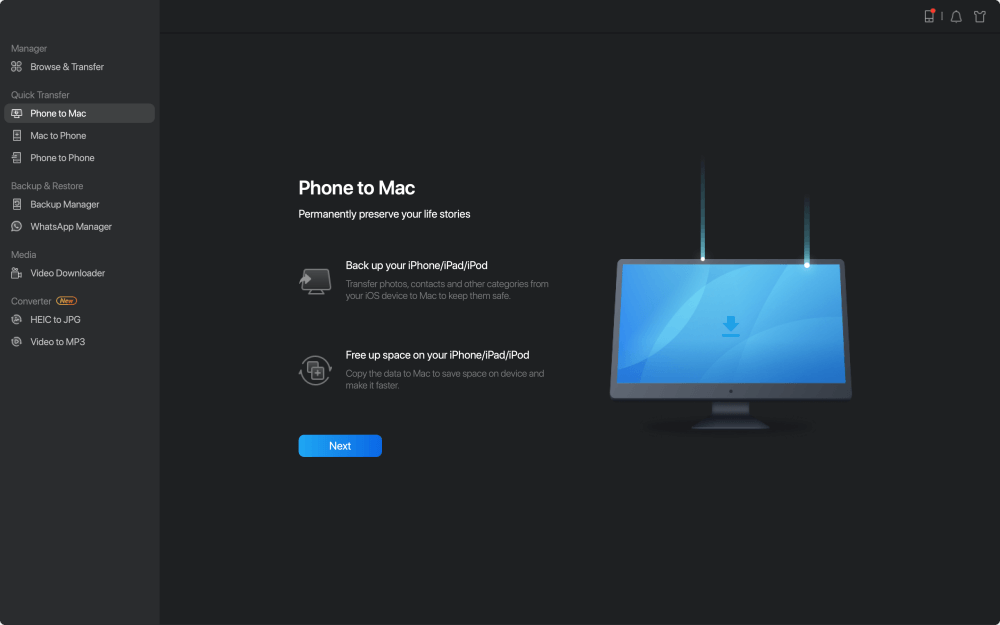
Step 1.Connect your iPhone to Mac with a USB cable. Run EaseUS MobiMover, choose "Phone to Mac" and click the "Next" button to continue.
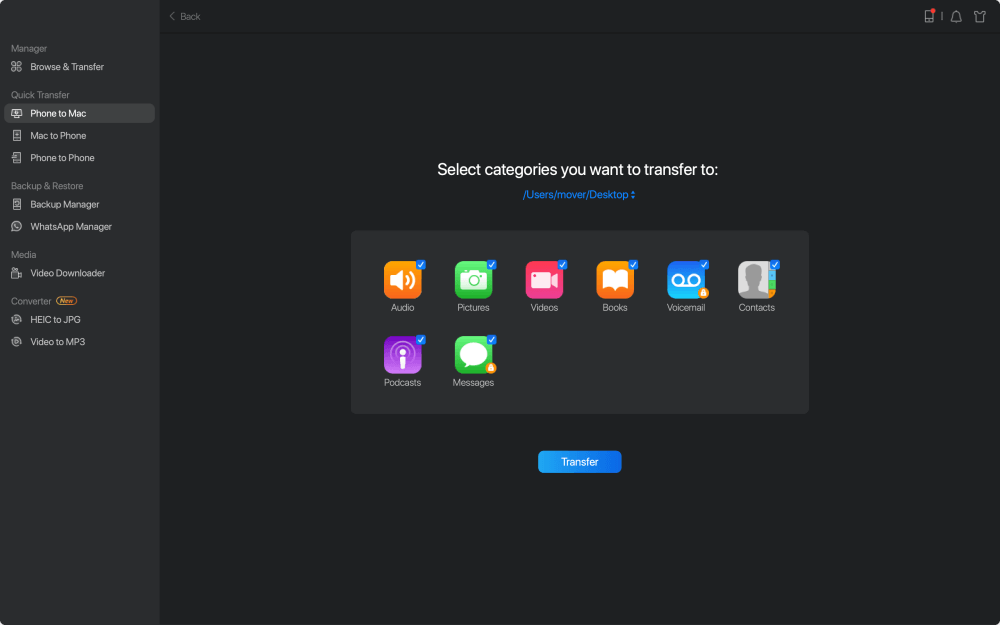
Step 2.Check the category/categories you want to copy from your iPhone to Mac. As you can see, you can copy other supported files together with photos from your iPhone to Mac all at once. After that, don't forget to customize the storage path for the exported photos unless you want to save them on your desktop.
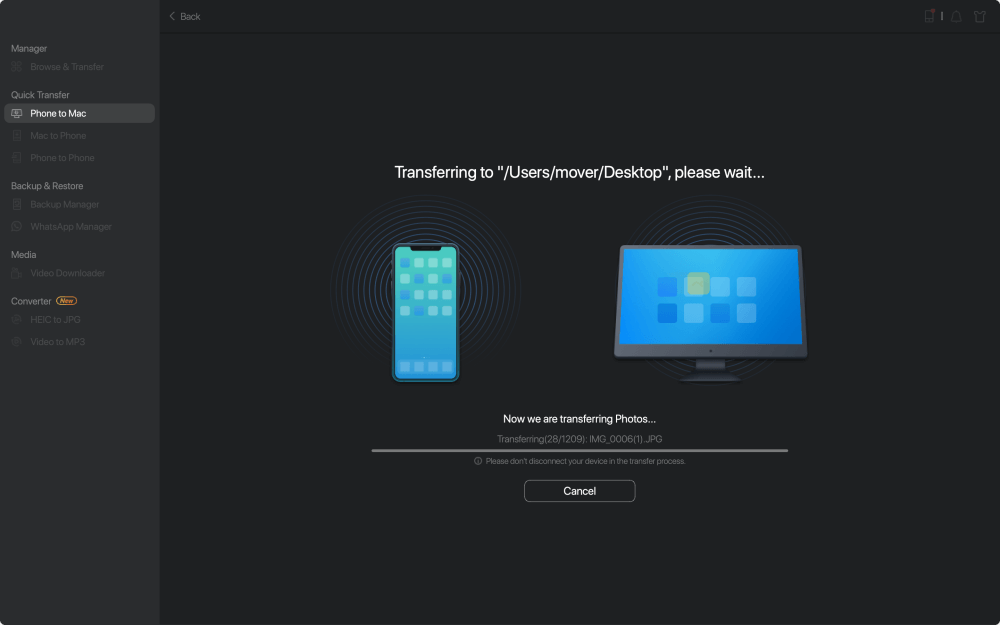
Step 3.Now, click the "Transfer" button to start transferring photos or other files from your iPhone to Mac without iTunes. Exporting files from iPhone to Mac with MobiMover is the right way for backup to avoid unexpected data loss.
The Bottom Line
We hope you have learned how to use AirDrop to deliver photos and videos on your iPhone and Mac by reading our post. As you can see, every method has its strengths and weakness. You can choose the one that best suits your needs.
Was This Page Helpful?
Daisy is the Senior editor of the writing team for EaseUS. She has been working in EaseUS for over ten years, starting from a technical writer to a team leader of the content group. As a professional author for over 10 years, she writes a lot to help people overcome their tech troubles.
Myra joined EaseUS in 2017. As a big fan of Apple products, she mainly focuses on iOS data transfer and iOS troubleshooting tips. Meanwhile, she is expanding her knowledge and skills in other fields like data recovery and disk management. Myra is open-minded and likes both extensive and intensive reading. Other than reading and writing, she is also fond of mobile games and K-pop stars.
Related Articles
How to Transfer Large Videos from iPhone to Mac
![author icon]() Myra/Apr 18, 2023
Myra/Apr 18, 2023How to Transfer Voice Memos from iPhone to Computer Without iTunes
![author icon]() Myra/Apr 18, 2023
Myra/Apr 18, 2023Contacts Didn't Transfer to New iPhone? Fixes Here!
![author icon]() Myra/Apr 18, 2023
Myra/Apr 18, 2023How to Get Music Off iPod in Windows 10
![author icon]() Myra/Apr 21, 2023
Myra/Apr 21, 2023