When you want totake a screenshot on your iPhone 8/8 Plus/Xand only to find it cannot work properly, it could be quite frustrating. Capturing your iPhone screen is one of the commonest needs when you use your device. But not everything can go smoothly on your iPhone without any trouble. No matter it's because something wrong with your iPhone 8/iPhone 8 Plus/iPhone X or because you don't know how to operate it correctly. If you are encountering the problem "screenshot not working" in iOS 11 on your iPhone 8/8 Plus/X, follow the solutions below to fix it quickly.
-
Notice
-
Looking for thefree software to transfer photos from iPhone to computer? Read the article to get what you want.
Fixes to iOS 11 "screenshot not working" on iPhone 8/iPhone 8 Plus/iPhone X
Solution 1: Use AssistiveTouch to screenshot iPhone
We all know the common way to take a screenshot on iPhone, which is to hold both Sleep/Wake button (Side button) and Home button at the same time. While if the screenshot not working in iOS 11 when you press these two buttons, there is another choice for you, which is to use AssistiveTouch. The steps below introduces the way to turn on AssistiveTouch on your iPhone in iOS 11 and how to use it to screenshot iPhone.
Step 1: Go toSettings>General>Accessibilityon your iPhone 8/8 Plus/X.
Step 2: Scroll down to chooseAssistiveTouchand toggle it on.
Step 3: Then go toCustomize Top Level Menu... and tap on thePlus signto add a new icon.
Step 4: Tap on the newly added icon, chooseScreenshotand clickDone. Then you will see Screenshot option in the AssistiveTouch Menu.
Step 5: Go to the screen you want to take a screenshot on your iPhone 8/8 Plus/X, click theAssistiveTouch buttonon your screen and chooseScreenshotto screenshot your iPhone. Generally, using this method to capture your iPhone screen is much easier than pressing the button combination, which may activate Siri or lock iPhone screen if you don't do it correctly.
![Fix screenshot not working on iPhone 8/8 Plus/X - Solution 1]()
Solution 2: Use 3D Touch on the AssistiveTouch icon to screenshot iPhone
When iPhone X or iPhone 8 screenshot not working by pressing the Home button and Sleep/Wake button, there is another alternative way to help you take a screenshot on your iPhone instead of using the method introduced in Solution 1, which is to use 3D Touch on the AssistiveTouch icon to perform the action of screenshotting iPhone.
Step 1: Go toSettings>General>Accessibilityon your iPhone 8/8 Plus/X.
Step 2: Scroll down to chooseAssistiveTouchand toggle it on.
Step 3: Go toCustomize Top Level Menu...and click3D Touch Action.
Step 4: Among the list of actions you can perform using 3D Touch on AssistiveTouch icon, chooseScreenshot.
Step 5: Go to the screen you want to take a screenshot on your iPhone 8/8 Plus/X andpress AssistiveTouch icon stronglyuntil you feel the vibration of your iPhone. Then a screenshot is successfully captured on your iPhone.
![Fix screenshot not working on iPhone 8/8 Plus/X - Solution 2]()
Solution 3: Force restart iPhone 8/iPhone 8 Plus/X
As one of the solutions to fix the problem "touch screen not working in iOS 11", force restarting your iPhone can also solve the "screenshot not working on iPhone 8/iPhone X" in some cases. The way to force restart iPhone 8/iPhone 8 Plus/iPhone X in iOS 11 is different from force restarting earlier iPhones. The steps to make it is shown below.
Step 1: Quickly press and releaseVolume Up button.
Step 2: Quickly press and releaseVolume Down button.
Step 3: Then press and how theSleep/Wake button(Side button) until the Apple logo appears.
Notes:
Do you need acompletely free iOS data transfer toolto help you transfer data to or out of your iPhone/iPad? If your answer is "Yes,"MobiMover Freecan be a perfect choice for you. MobiMover is the world's first free software for iOS data transfer. With MobiMover installed on your PC (running Windows 7 or later), you can sync files from computer to iPhone/iPad, back up iPhone/iPad contents to the computer,transfer data from iOS to iOSiOS和管理文件的删除/添加/编辑它ems from a computer. Photos, videos, audios, contacts, messages, notes and more are all included in the support list of MobiMover. Don't hesitate to try this free software to help you when it comes to iOS data transfer. Following steps show you how to transfer back up iPhone data to your computer.
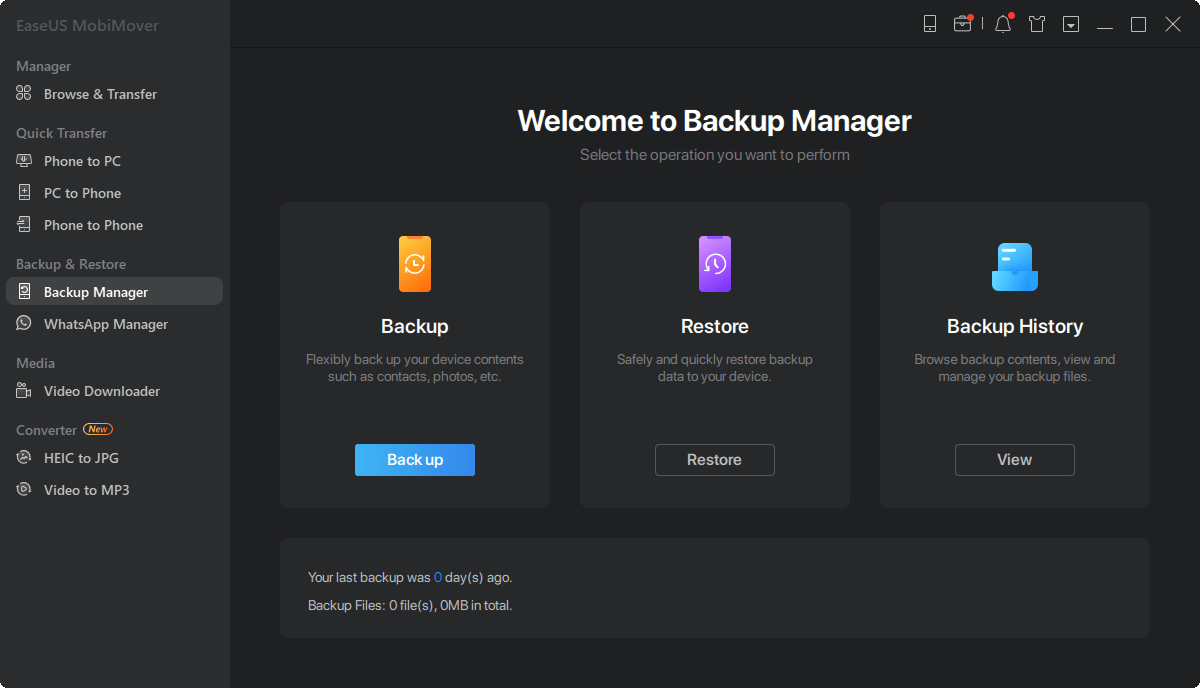
Step 1.Connect your iPhone to your PC and trust the computer. Launch EaseUS MobiMover and go to "Backup Manager" > "Back up".
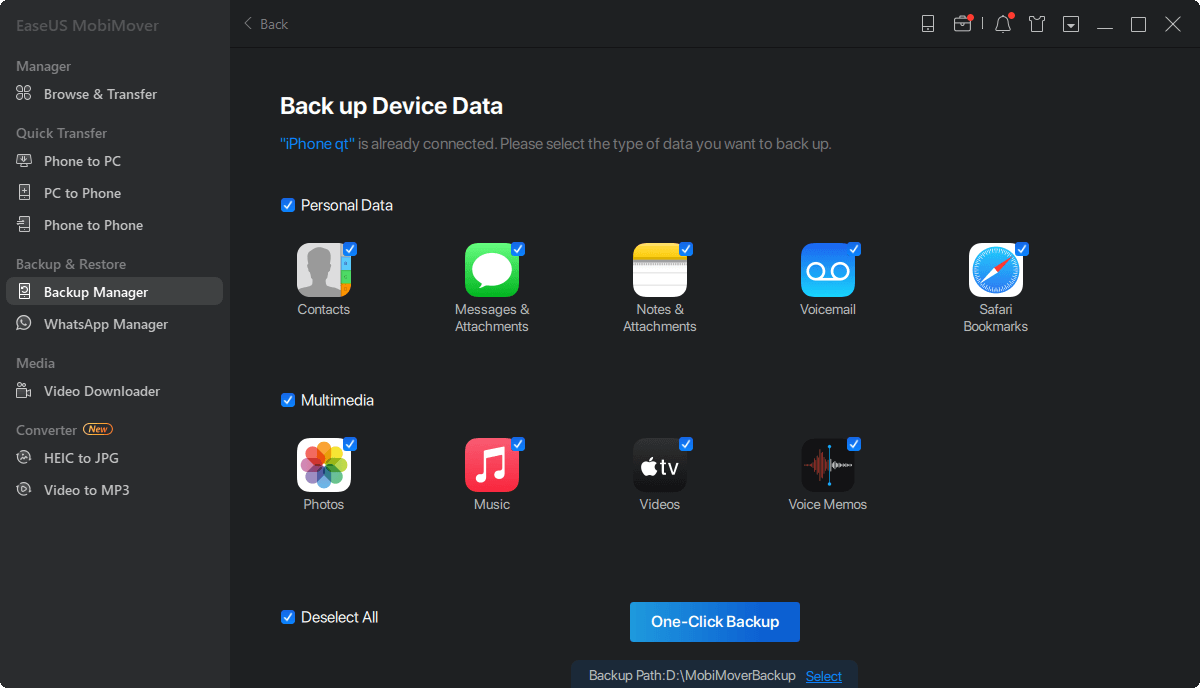
Step 2.Since all the supported files are selected by default, click "One-Click Backup" directly to start backing up your iPhone to computer.
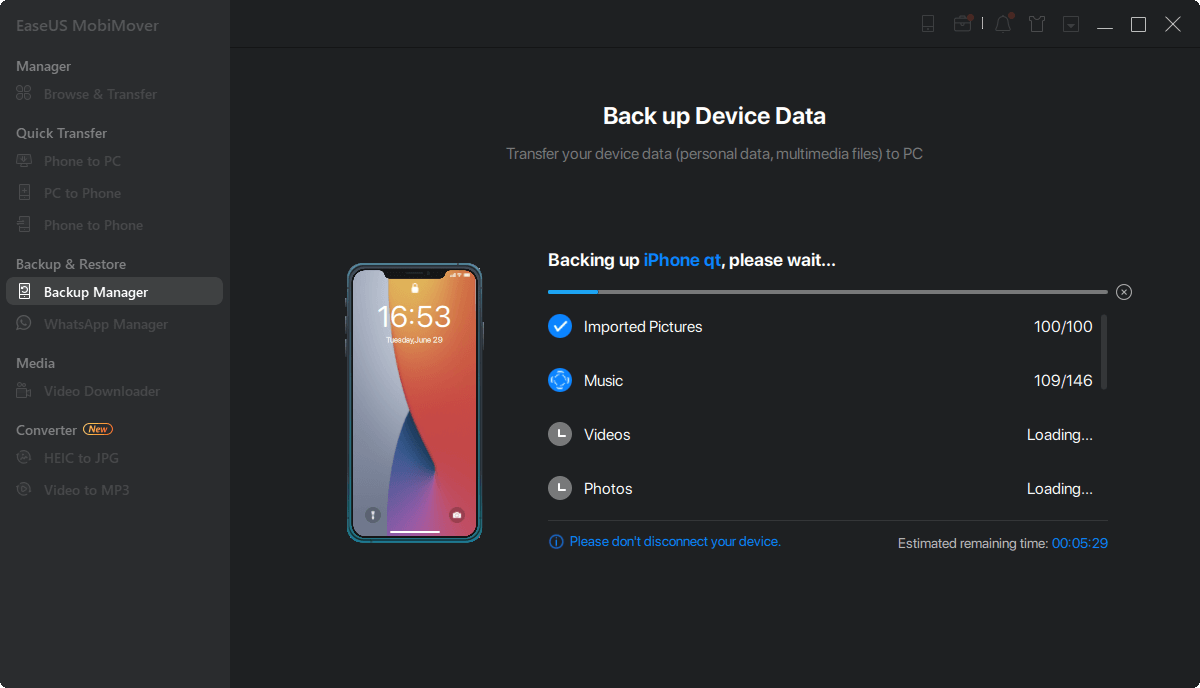
Step 3.Wait patiently until the backup process completes. When you need to restore the backup, go to "Backup Manager" > "Restore" and follow the onscreen instructions to continue.
HOT


