Many users have reported the problem "Cannot connect to iTunes Store" in iOS 11 on iPhone or iPad. That's why this article that provides to potential solutions to the "Cannot connect to iTunes Store" in iOS 11 is written. If you are encountering the same problem on your iPhone/iPad running iOS 11, no matter its previous iPhone/iPad newly upgraded to iOS 11 or new iPhone X/8/8 Plus in iOS 11, you can apply the solutions below to your iPhone/iPad to fix the "Cannot connect to iTunes Store" in iOS 11. Read on and learn what to do quickly.
![Fixes to cannot connect to iTunes Store in iOS 11]()
Fixes to "Cannot connect to iTunes Store" in iOS 11
As you may know, there are many causes that can lead to the issue. Thus the fixes vary and the solution works well for others may not be workable for you. What you can do is to keep trying and find the tip that can help you out. There is another common problem on iPhone/iPad in iOS 11, which is "touch screen not working". The solutions to it are also provided.
Tip 1: Enable iTunes Store to use both WLAN & cellular data
For iTunes Store to work properly, you need to enable iTunes Store to use WLAN or cellular data. So the safest way to ensure a normal functioning of iTunes Store is to allow it to use both WLAN & cellular data. How to make it? Turn on iTunes Store on your iPhone and then go to年代ettings>Cellular>iTunes Store>WLAN & Cellular Data. After that, double-click the Home button on your device to shut down iTunes Store and then go to open iTunes Store again. Is the problem "Cannot connect to iTunes Store" in iOS 11 solved using this tip? If not, try the methods below.
Tip 2: Check network connection on iPhone/iPad
As mentioned above, iTunes Store requires the network connection to work, no matter it's WiFi network or cellular data. Thus ensuring a good network is of first importance. You can use other WiFi-supported devices to check whether it's something wrong with the network. If the "Cannot connect to iTunes Store" in iOS11 happens due to the WiFi network, learn the fixes to WiFi not working in iOS 11 to solve the problem.
Tip 3: Set correct date and time
If the Date & Time is not set correctly for your time zone, the issue "Cannot connect to iTunes Store" can happen. Go to年代ettings>General>Date & Time> turn on年代et Automatically.
Tip 4: Check system status
The occurrence of the problem may be caused by the problem of Apple Service. Go to the Apple System Status page (https://www.apple.com/support/systemstatus/) to check the system status. If you find iTunes Store is not currently available, what you can do is to wait for Apple to fix the issue.
Notes:
No matter you are an iPhone user or iPad user, you may frequently need to transfer data to or out of your iPhone/iPad. That's why I recommend a totally free iOS data transfer tool,MobiMover Free, for you here. With MobiMover installed on your PC running Windows 10/8.1/8/7, you can sync files from computer to iPhone/iPad (likeadding ringtones to iPhone X), iPhone / iPad内容备份到电脑上,分享files between iOS devices and manage iOS data from computer without any limitation. Now, download MobiMover on your computer and start to protect your iOS data by exporting the files to the computer at one click.
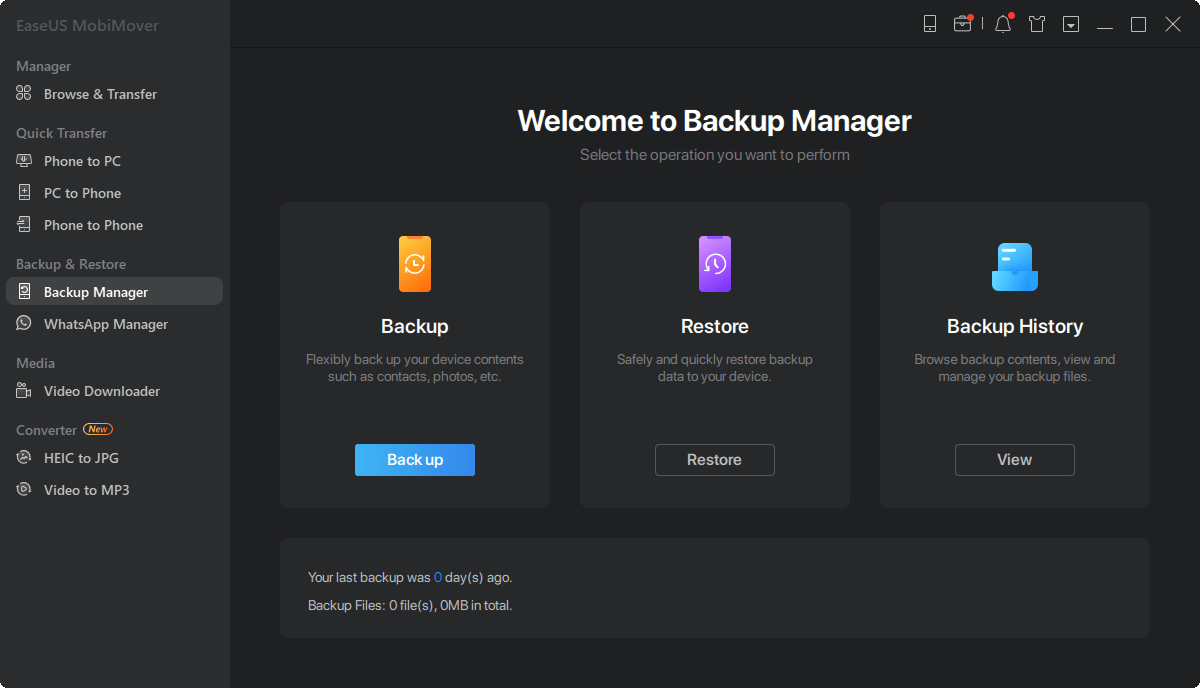
年代tep 1.Connect your iPhone/iPad to your PC, unlock your device, and trust the computer. Then run EaseUS MobiMover and navigate to "Backup Manager" > "Back up".
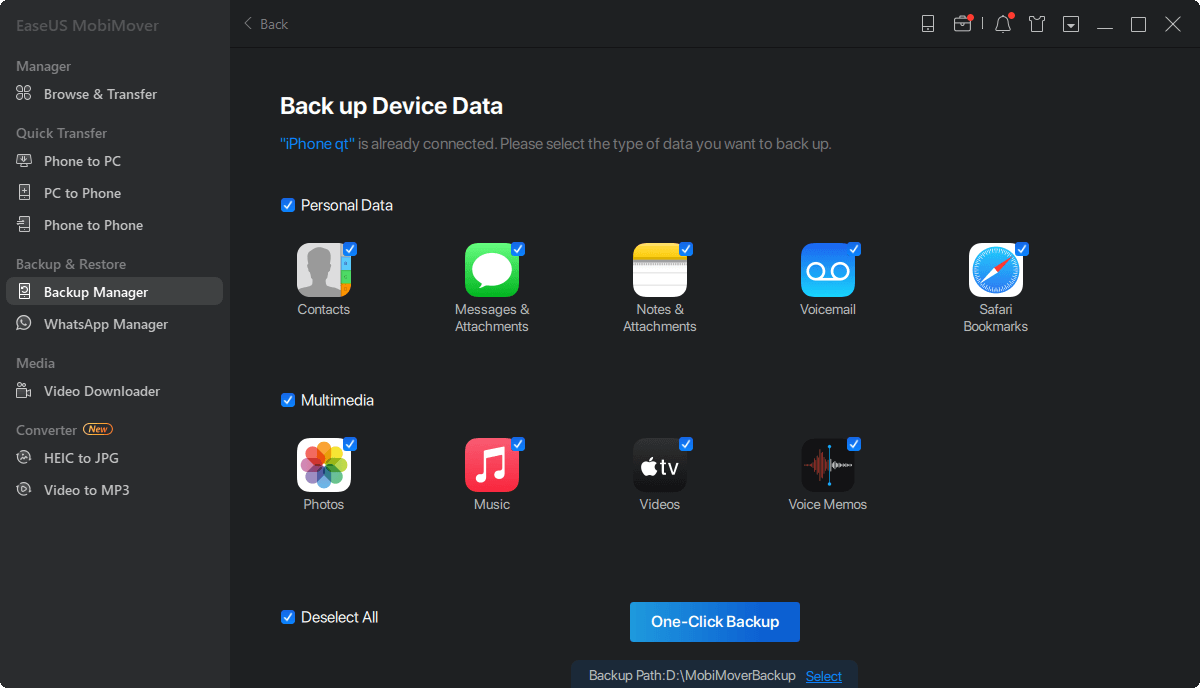
年代tep 2.Check the categories you want to back up from your iPhone/iPad and then click the backup button to start backing up your device data.
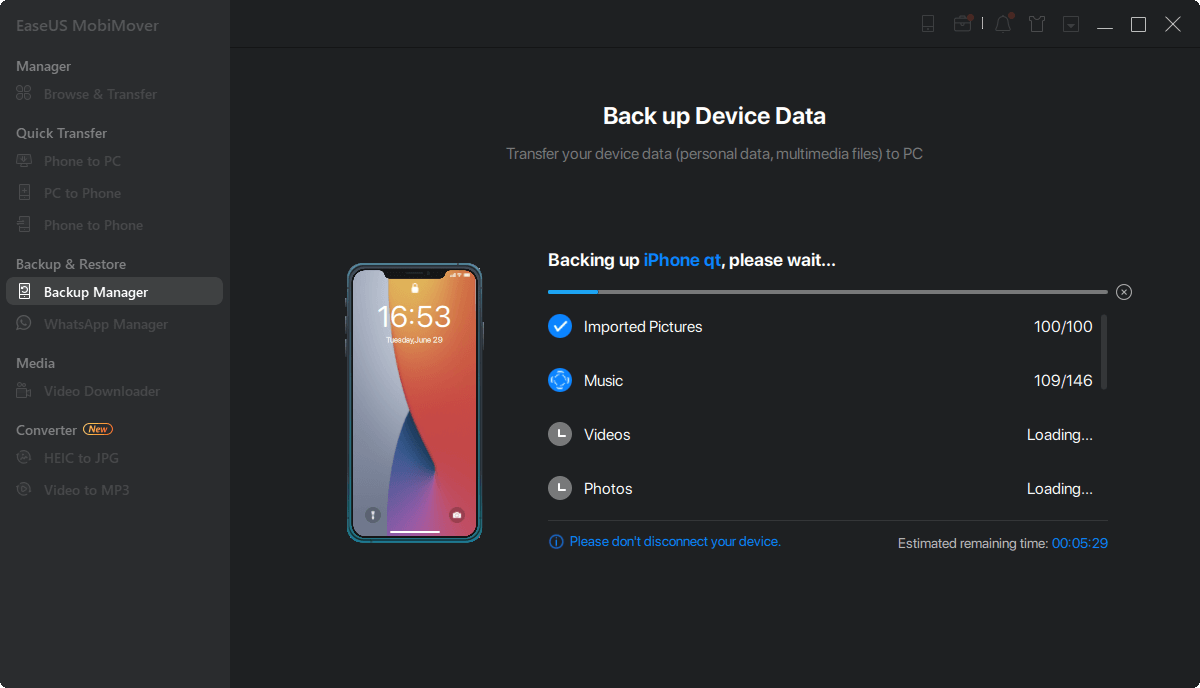
年代tep 3.Wait for the backup process to complete. If you need to restore the backup to your iPhone/iPad in the furture, go to "Backup Manager" > "Restore" to get it done.
HOT


